Hi ! In this post, I’Il show you how I to setup PostgreSQL with TypeORM in a GraphQL server. This is the backend setup that I usually use for my backend’s side projects.
This tutorial is focused on MacOS environment 🍏. I might write other tutorials later for Windows and Linux.
MacOS Postgres Setup
The easiest way to do it is by using Homebrew, which is a MacOS package manager.
To install Homebrew, run this command in the terminal:
| |
Once the installation is over, we need to install the postgresql package:
| |
To make sure that everything got installed, the next command should return the version of the postgresql installed:
| |
Create the Database
Now that we have PostgreSQL installed, we need to create a database that we will connect to. We’Il name our database graphqldb.
Run the next command in the terminal:
| |
This will create a new database for us. To connect to it for testing purposes, you can use TablePlus(Free).
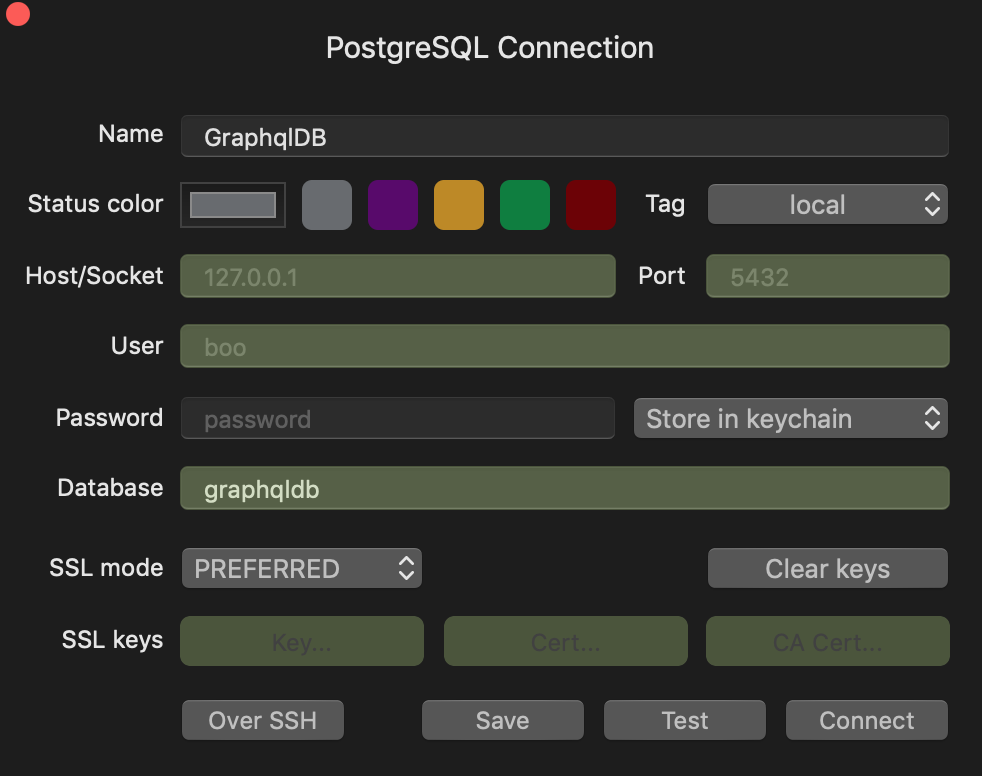
To test if the database exists, create a new connection on TablePlus, give it a name, in my case I named it GraphqlDB, and give it a database name, which is graphqldb (the name of the database that we created earlier), then click on Test. If All the fields turn green then the database is created and we’re ready to connect to it.
Setup the project using Typescript
Now let’s create a new project using typescript, to do that we need to install some dependencies.
First let’s create a new project folder:
| |
now that we’re inside the project folder, we need to install typescript as a dev dependency and create a tsconfig file:
| |
Create a new file, tsconfig.json and paste the following code into it:
| |
We’il use nodemon so that we don’t have to restart the server manually to test our changes. Create a nodemon.json file and paste the following code into it:
| |
Last but not least, add the following section to your package.json:
| |
Create the GraphQL Server
For our GraphQL server, we’Il use graphql-yoga which is a pretty handly all-in-one package for creating GraphQL servers.
Now, add this package graphql-yoga:
| |
To have a quick running graphql server, just copy the sample from graphql-yoga Quickstart section.
| |
Let’s add a User type to the graphql schema so that later we can add/edit/delete users from our database:
| |
Setup TypeORM:
As usual, we need to install some packages first :
| |
Once the installation finishes, add these two lines to your tsconfig.json:
| |
Create a ormconfig.json file to put our database configuration in it:
| |
As you see in the config, we need to create a folder entities and put our entites into it.
In our case we will create a simple User.ts entity:
| |
This entity has the same attributes as the GraphQL User type we created earlier.
Now inside index.ts we need to create the database connection before we start our server:
| |
Create addUser Mutation
To test if the setup is as good as we want it to be, let’s create a mutation that adds a user to the database.
First we need to update our schema:
| |
Now we need to resolve the addUser mutation and the user query, we’Il need to use TypeORM’s getRepository (I’Il write another blogpost to details TypeORM ):
| |
Let’s add a user now using this mutation. Go to http://localhost:4000 and add a user:
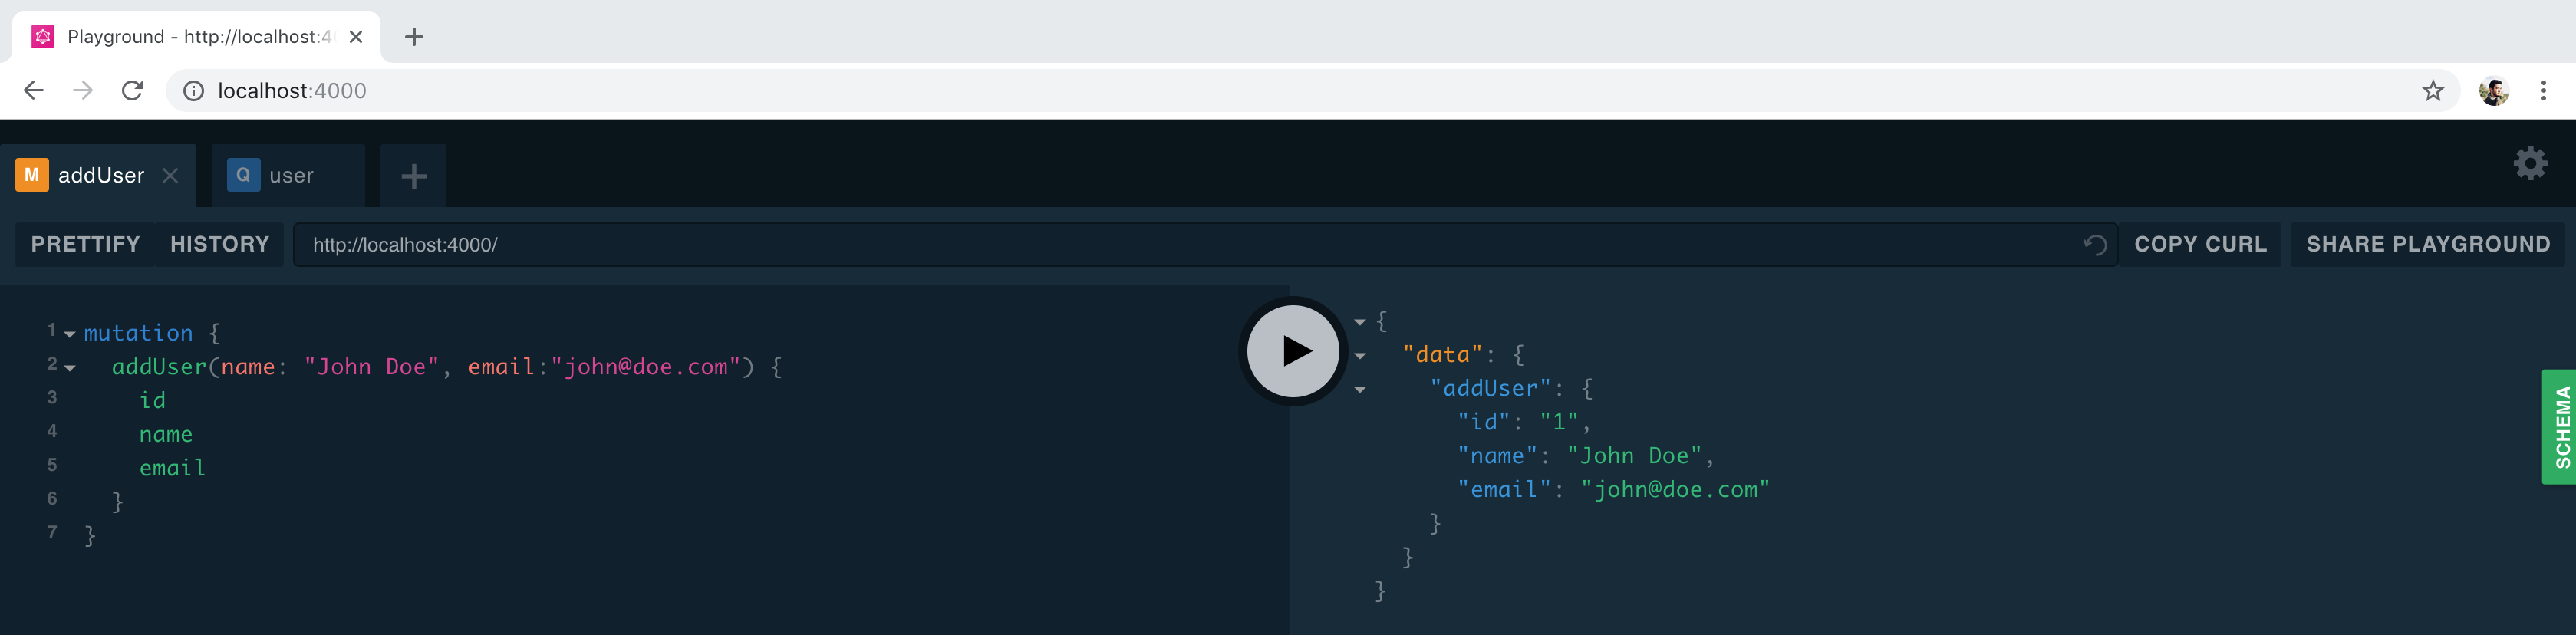
As you can see on the right, we created a user with id 1.
Let’s try to query the user we just added using his Id:
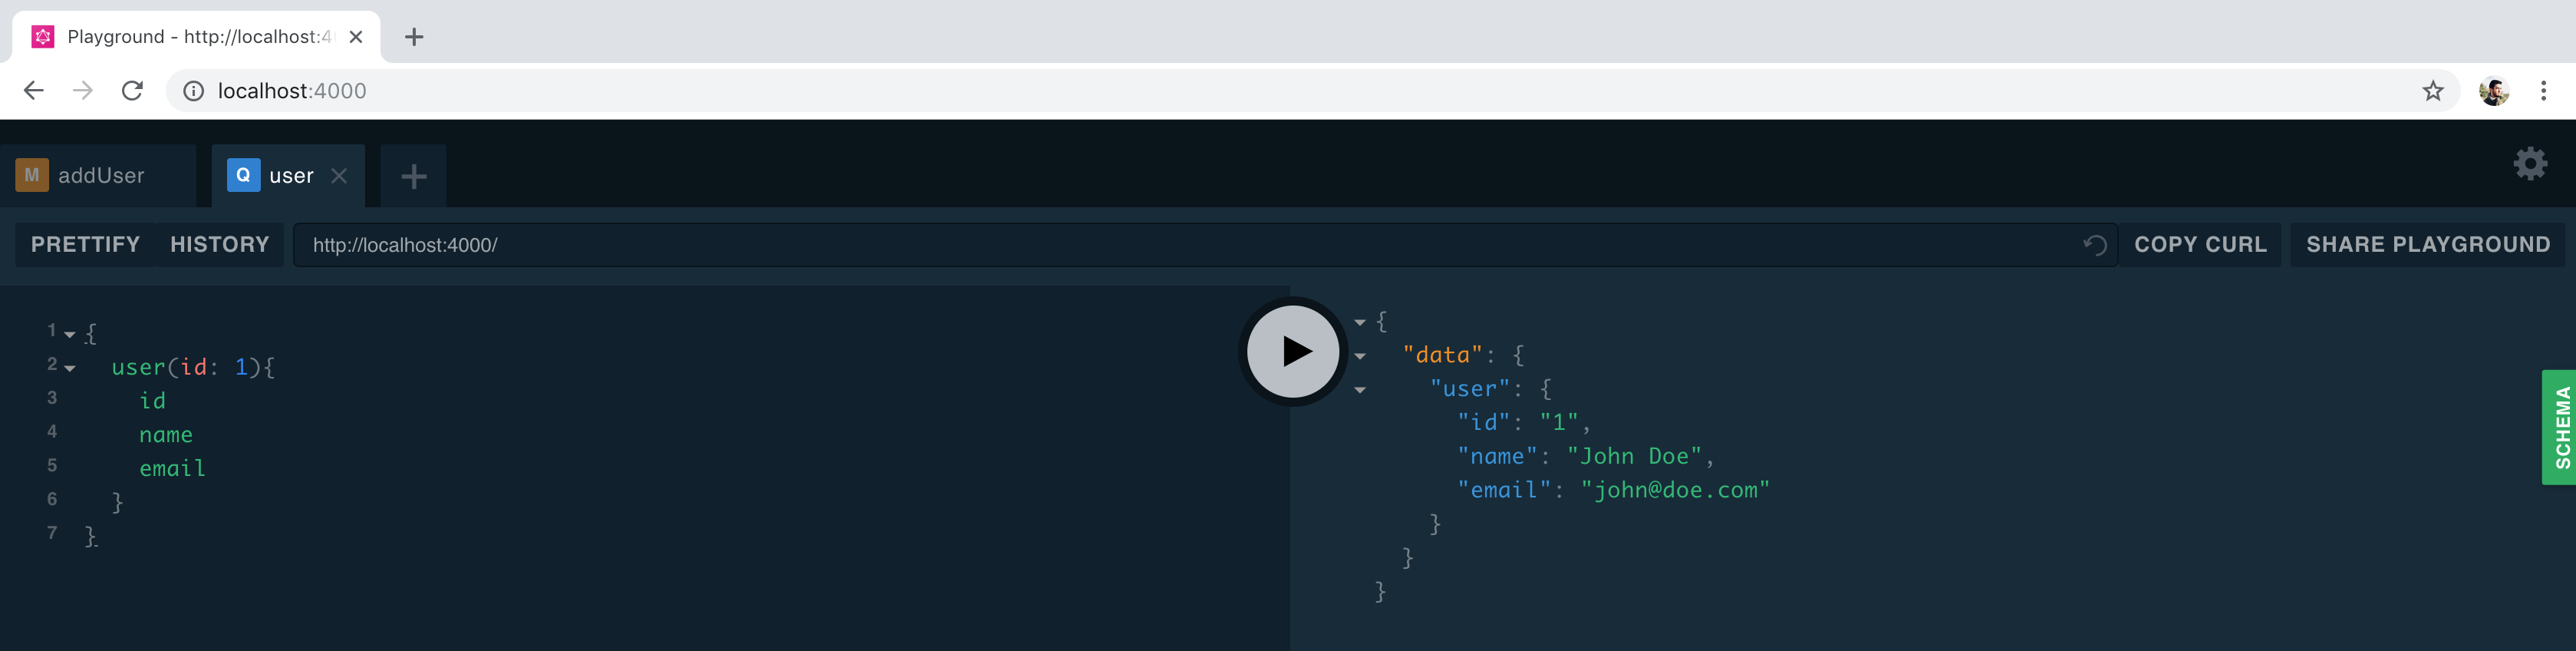
Aaand we got the user back 🎉🎉